Why I Like PyCharm, Especially its Pro Edition
Setting up PyCharm Professional Edition for Remote Python Development.
 https://www.jetbrains.com/pycharm/
I’ve been using PyCharm for 5 years til now, including 2 years of time with its Professional Edition (the rest 3 years were depressing). Here is a summary on how it’s setup for my daily Python development tasks.
Overall Workflow
Philosophy
-
Use local computer as a
terminalto the cloud, and do only light-weighted tasks, e.g. managing files or source code, browsing documentation and search the Internet (more precisely, StackOverflow), etc. - Leave heavy-lifting tasks to disposable remote machine(s) on either on-promise or public cloud, i.e.
- Program compiling, running and execution, e.g. GPU/TPU for Deep Learning tasks.
- Network traffic, e.g. docker Pushing/Pulling, big dataset version control and its Uploading/Downloading.
- Dataset management, e.g. PySpark job, SQL ETL, etc
In short, don’t do any of this things on your local machine, regardless how powerful you think your computer is, how fast you assume your Broadband is, or how cheap you estimate your electricity bill is.
- Leverage Git repository, e.g. GitHub, to version control source code.
- Use Container Registry, e.g. Docker Hub, to manage your environment dependencies.
Setup
Following these philosophies, a typical end-to-end setup would look like this [^1]:
More details will be covered below, but on a high level the workflow looks like:
- Step 1.
git pullsource code from Git repo to local machine. - Step 2.1. Boot up remote resources, e.g. compute instance with GPU enabled, and use remote Python Interpreter with PyCharm Remote.
- Step 2.2. Set up file Sync with PyCharm Deployment including
.git/, which automatically Sync local files to the remote directory. - Step 3. Start Jupyter Notebook server on the remote, and setup SSH tunnel to the local, so you can do interactive coding Experiments in your local browser.
- Step 4.1 Modularise code from Jupyter and organise it into Python package with help from an Integrated Development Environment (IDE) like PyCharm, including
- Reformatting, e.g.
Black. -
PyLint. - Docstring, e.g. Numpy style.
- Unit testing, e.g.
PyTest. - Dependency requirements, e.g.
pipreqs .in root folder. - Command Line Interface (CLI), e.g.
setup.pyentry point. - Documentation, Sphinx + Jupyter Notebook
- Install the Python package at remote, e.g.
pip install -e .
- Reformatting, e.g.
- Step 4.2 Write
Dockerfile(local), build Docker Images (remote) and push it (at remote) to Container Registry, e.g. Docker Hub. - Step 5 Run Docker container on Remote, and test the functionalities are achieved per design.
- Step 6
git pushsource code back to Git repo for back-up and peace-of-mind. - Step 7 Setup CI/CD pipeline to automatically run unit testing, compile documentation, update docker images, etc.
This post will focus on Step 2, 3 and 4 setting ups with PyCharm Pro.
[1] In case you wonder how the above graph is generated in Markdown with
Jekyll:@startmermaid sequenceDiagram 🗒 Git Repository️->>💻 Local: (1) Version Control 💻 Local->>🗒 Git Repository️: (6) Version Control 💻 Local->>☁️ Remote: (2) Source Code Sync ☁️ Remote->>💻 Local: (3) Jupyter Notebook Note right of 💻 Local: SFTP/SSH Tunnel ☁️ Remote->>🐳 Docker Registry: (4) Push 🐳 Docker Registry->>☁️ Remote: (5) Deployment 🗒 Git Repository️->>🐳 Docker Registry: (7) CI/CD @endmermaidTo get
mermaidrendered inJekyll, you need to configure its plugin jekyll-spaceship.
Python Modularisation
For every project, what you are doing end of the day shall be developing a software (in our case Python) module, to be hand over and re-used by yourself, your colleague, your client, your community or your market, perhaps in form of a delivery product that’s running online. If this is not the case, think twice about what the outcoming artifact is by end of your time, and why you are adding value with that time and resources spend.
The gap between a Python newbie versus a professional developer, most of the time can be superficially overcome via the following 3 steps.
From Python Scripts to Python Package
Everything is covered in this 3min less step-by-step answer. Just read and follow.
Command Line Interface (CLI)
If you are sick of python script.py or chmod +x script.py && ./script.py, all you need are the following 3 resources:
Project Template
After manually adding files several times, including:
README.MDrequirements.txtsetup.pyDockerfile.gitignoreLicense- …
You’ll realise you need something like Pyscaffold.
Remote Kernel and File Synchronisation
Everything in this world is an Optimisation problem, consisting of:
- Objective(s)
- Constrain(s) or requirement(s)
- Algorithm, strategy or tools, that return an acceptable solution within reasonable amount of time.
Yes, setting-up optmisation is an optimisation problem itself, too.
Now we shall be clear that (a) our objective is to develop professional Python module, and (b) our requirement is to fullfill the setting up philosophy that do no heavy-lifting at local but only cloud.
Let’s see how the tool Pycharm Pro can help us to do this. At this stage, you shall get access to a remote compute machine with credentials, and setup a Python environment there, e.g. with Miniconda.
If you wonder how to get a remote computer at free cost, consider the following options:
- Whether your organisation or institute have a High Performance Computing (HPC) cluster, and see if you can request a node. This normally apply to national education or research institute, e.g. Universities.
- Whether your company have on-promise data center.
- Whether your team do daily DevOps on public cloud.
- Public cloud free tier, though this option won’t give you compute instance type more mighty than your local one.
- Public cloud Credits.
- Public cloud Funding Program for Startups, Academic Research Projects, e.g. AWS Cloud Credits for Research.
Remote Kernel
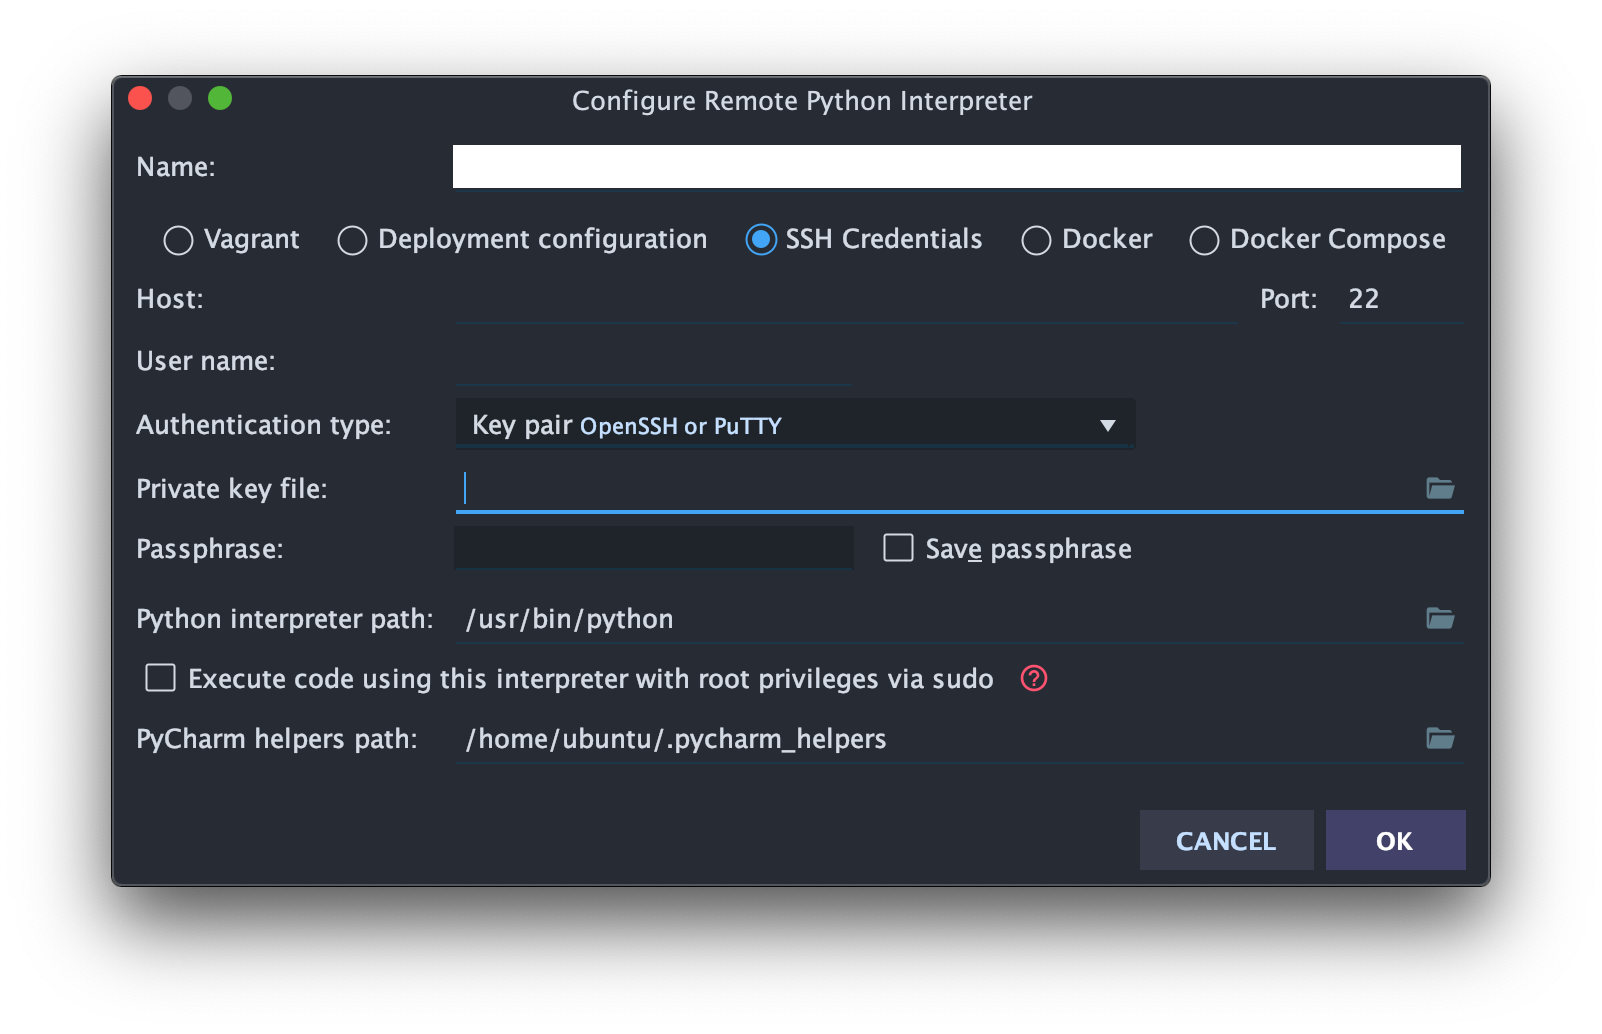
There are different ways to choose a Python interpreter in PyCharm Pro, one of which is SSH interpreter, as shown in the image below. Here, you can type in the Host, Port and Username.

After which you can input credentials information, e.g. Authentication type, Private key file and its Passphrase if applicable.
You shall explore
DockerandDocker Composeas well.

Finally, we can specify the Python Interpreter path on the remote instance, and also map the current project root to a directory on the remote. Check the box Automatically upload project files to the server.

Source Code File Deployment
Now we can setup the deployment options. Below is my personal preference. Key points are:
-
Remove
.git/from theExclude items by name. This may be controversial but is vital for our setup:- When you install your package with
pip install -e .on the remote, some package has hard requirements to have.gitpresent in the root folder otherwise it won’t install. - You do normal
gitoperations only on local, and they will be automatically reflected on the remote. This saves you from doinggit pushat local followed bygit pullon remote 24/7, even if your code is not ready forcommitat all.
- When you install your package with
- Check
Create empty directory. If you ever worked withFlaskserver you’d know what I’ve experienced. - Check
Delete target items when source ones do not exist. Upload changed files automatically to the default server: Always

In short, we maintain one source-of-the-truth at local, and have the remote be an exact mirror copy of that.

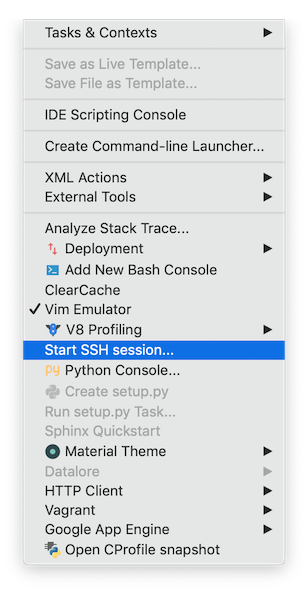
Under Tools, select Start SSH session, then you will open an Terminal to your remote server. Now it’s time to switch on Tmux and run pip install -e . in your Python package root directory at remote, and we’ve completed Step 2.
Jupyter Server: SSH Tunnel Port Forwarding

In the same Terminal to the remote, maybe within Tmux, start Jupyter server on the remote with, e.g. jupyter notebook --no-browser. You will be returned with Jupyter server url, port number, and maybe its token. However, all of these information right now is relative to the remote instance only – you won’t be able to reach them from local.
Unlike life, in Python most of the problems we run into had already been resolved by those pioneers for us. The solution to the above problem is given:
In short, at Terminal to the local, do
ssh -i <path-to-private-key>.pem -N -f -L localhost:<local-port-you-prefer-e.g.-8888>:localhost:<remote-port-shown-on-previous-terminal> <remote-user-name-e.g.-ubuntu>@<remote-hostname-e.g.-57.249.126.45>
Now you shall use your local browser and go to http://localhost:<local-port-you-just-specified>. If you can create a new Jupyter notebook, select your Python kernel, and run successfully import <you-python-module-name>, then we’ve completed Step 3.
What you can do now typically is, git checkout to a feature branch at local, experiment with different code in notebooks with local browser, and keeps modularising your ideas into source code sitting in PyCharm Pro and get them into good shape using best practises, as described in Step 4.1. Finally, do git push to the code repository periodically.
However, be aware that all the heavy code executions, data management, network traffics occur at the remote, but reflected in your local browser in notebooks, which can be downloaded as HTML or organised into documentation with Sphinx.
Docker BUILD and PUSH
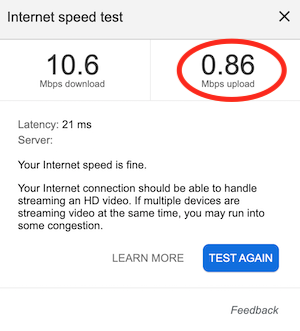
Docker image Building and Pushing would take a lot of network traffic. Don’t ever try to do, especially docker push from local. Why? The following image taken while WFH will answer that:

Life is short, just cherish it.
Summary
Nothing is perfect in this world, but I’d like to focus on their strength. Some other features I love about PyCharm Pro is:
Some of them may be available in Community Edition as well.
- Intelligent Auto Fix: whenever there is an error or warning, put cursor on it and just
⌥+return. -
Optmise imports: remove unused import automatically. - Auto Completion & Code Snippets: a responsive and smooth experience.
- lubricating code navigation and go into definition, regardless how large the project is.
- Comprehensive templates of python frameworks.
- Good quality plugins.
Next
In the next post, I’d describe how Visual Studio Code is setup and what tasks it is good at.